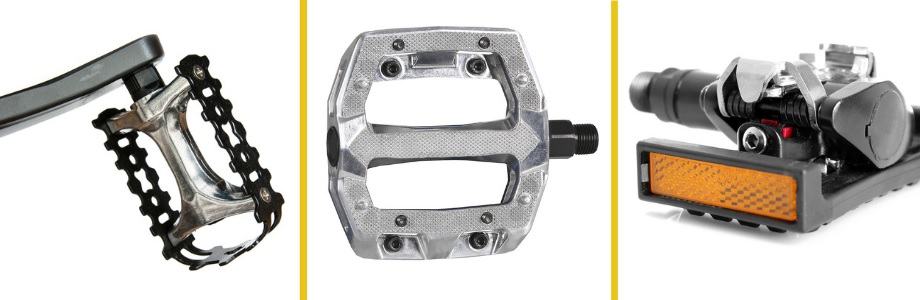
Have you ever removed the bicycle pedals from your bicycle for any reason whatsoever? Maybe it was because the pedals were worn smooth, with minimal thread left on them to allow for a solid grip with your sneaker. Perhaps it was because you discovered a fascinating off-road trail that was surrounded by mud and rough patches, so now your bicycle pedals are somewhere under the muck. It could be that you're storing your bicycle away for the season and don't want the rubber of the pedals to be exposed to any harmful elements.
There could be several reasons for wanting or needing to remove your bicycle pedals, but how exactly do you do it? It is a task that will take time and patience, especially if you'll be cleaning or repairing the pedals.
With that in mind, here's our advice on how to remove bike pedals.
Why Remove Your Bicycle Pedals?
You may be thinking, "Why would I ever remove my bicycle pedal?" But like any machine, bikes require maintenance, or else you'll get a stuck pedal. Pedals are essential—without them, it is impossible to ride or maneuver it. There are a few reasons to remove bicycle pedals, and it could include:
- You have a stuck bike pedal, or it's clogged with muck, dirt, and debris. If your foot cannot rest properly on a stuck bike pedal of the bicycle, the chance of injury increases.
- The pedal rubber could be worn smooth, leaving no thread or grip for the rider's foot. If their foot happens to slip off the pedal, they lose control and can injure themselves or others.
After removing and fixing the pedals, you may also need to adjust them. To prevent accidents and ensure proper braking, check out this guide on adjusting bike brakes.

What You Will Need
For pedal removal at home, use the following:

- A large open space to work comfortably and move around without any obstacles
- Old rags or shop towels for messy situations and drying
- Long-handled Allen key wrench
- Pedal wrench (available at any bicycle repair shop or hardware store)
- Lubricating bicycle pedal spray
- Cleaning solution
- <Optional> Bike stand. Having a bike stand or training wheels helps because the bicycle remains upright while working on it.
Spare screws that fit the size of your pedal just in case they are needed
Any of the above supplies, tools, or equipment should be available at your local hardware store or a bicycle repair shop if you do not have them in your garage or bike tool kit.
Step-by-Step Removing Bicycle Pedals
Now that all the supplies and equipment have been gathered together, it is time to remove the bicycle pedals from your bike and perform your own maintenance or repair!
To fully remove a bike pedal, you need to:


Step One
Position bicycle uprightly in an open area. Keep something to brace the frame on the opposite side of where you're working.
Use a workbench or the wall to brace the bicycle in an upright position to prevent the bicycle from falling onto you, causing injury.
Step Two
Determine if your bicycle has wrench flats or the Allen key mechanism. This will choose if you use a pedal wrench or the long-handled Allen key.
Step Three
a. If your bicycle has wrench flats, start with the right side of the bicycle and move the pedal wrench counterclockwise to loosen the screws holding the pedal in place.
b. If the bicycle has no wrench flats and the Allen key is needed, place the long-handled Allen key in the slot on the pedal and begin twisting in a clockwise direction.
Step Four
Once the pedal is removed, turn the bicycle to the other side and access the left pedal.


Step Five
If your bicycle has wrench flats, place the pedal wrench in the flats and begin twisting in a clockwise direction to remove the left pedal (the counterclockwise motion will not work as the threads are reversed from the removal of the right pedal).
c. If the bicycle has no wrench flats and the Allen key is needed, place the long-handled Allen key in the slot and twist the wrench clockwise to remove the pedal.
Step Six
Ensure the wrench (Allen key) direction is the correct way, as the opposite can cause you to tighten too far and strip the pedal threading on the inside of the screws holding the pedal in place.
Step Seven
Now that both pedals are removed, you can easily clean them or discard them if they need to be replaced.
Step Eight
If you are cleaning your pedals, soak them in warm water with a cleaning solution added to remove built-up grease or dirt that can cause issues in the long term. Use a scrub brush if needed for stubborn areas, or simply wash the pedals with an old rag.


Step Nine
Let the pedals dry before re-installing them on the bicycle.
Step Ten
Once you are ready to re-install your bike pedal, you will need your Allen key or pedal wrench as described above.
Step Eleven
Use the bike grease to spray the threads attached to the bicycle pedals. Bike grease prevents rust, dirt build-up, and stripping of the threads.
Step Twelve
To re-install the bicycle pedals, choose the corresponding tool (pedal wrench or Allen key) and start with the right side of the bicycle.
Step Thirteen
Ensure you have the right-side pedal (most are marked with R for right and L for left) and line up the pedal with the crank arm threads.


Step Fourteen
Start threading the pedal clockwise by hand onto the threads. Once the pedal is tight enough to not fall off once you remove your hands, then it's time to start the left side.
Step Fifteen
Take the left side pedal and line it up with the threads of the crank arm to prevent cross-pedal threading. Using your hands only, start with a counterclockwise motion to tighten the left pedal onto the bicycle.
Step Sixteen
Once both pedals are tight on the bicycle in the proper position, use the corresponding tool (Allen key or pedal wrench) to finish tightening the pedals to the correct level to ensure they will not fall off the first time you take them on the trails.
Step Seventeen
Clean up your workstation and you are done!

Conclusion
We have just discovered and discussed why it is important to remove your bicycle pedals during certain times or incidents and how to do it yourself without having to bring your bicycle to an expensive service shop! With a bit of time and effort, you can easily remove your bicycle pedals at home for a cleanup job or total replacement. Once those bicycle pedals are cleaned and ready to ride, so are you! So hit the trails and enjoy being one with nature. And if you need more of a visual tutorial, here's a great video guide on changing and replacing bike pedals.